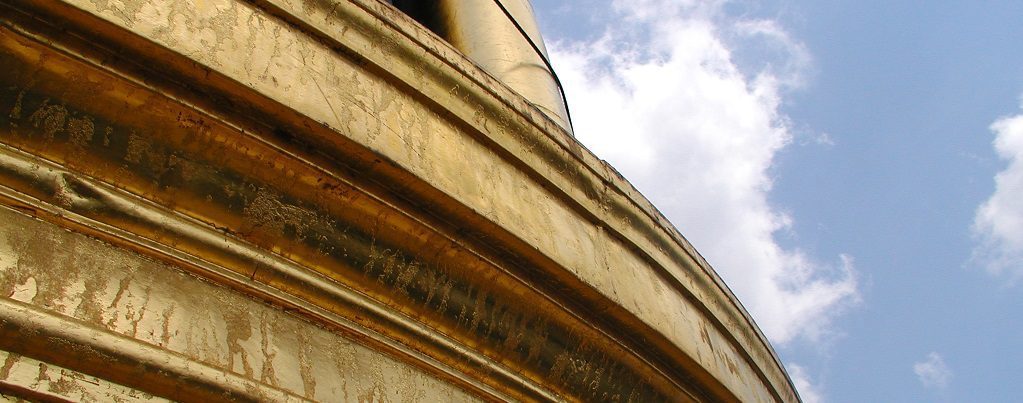
Steps to Repair Exterior Gilding
Exterior Gilding: Even the Noblest of the Elements Needs Care and Attention

Care, maintenance and repair of exterior gilded objects.
There are an intimidating number of stumbling blocks associated with exterior gilding projects. Novices and seasoned experts alike are subject to falling victim to any one of them along the way.
At Canning we are often called upon to correct or repair exterior gilded objects that were installed with improper materials or, more frequently, a lack of protocol when applying those materials. In these cases, it is usually a matter a removing the work in its entirety and starting over, following our methods and standards to achieve long lasting results.
Most often when mistakes happen, it’s simply because the gilder was rushing to finish a job and neglected to properly prepare the substrate by cleaning and removing prior materials that contaminate the new work. In other cases they neglect the importance of researching and confirming the chemical compatibility of products used, skip that second coat of primer or get a bit aggressive when they polish the final surface.
When preparing for an exterior gilding project, the artisan must pay close attention to the two most important variables in ensuring a successful outcome. The first consideration is the purity of the materials selected for the project. The second is careful attention to the application methods utilized.
It seems like a simple equation, if followed properly one is virtually guaranteed to achieve his or her desired outcome; a beautiful exterior gilded object that will last for decades.
In practice however, one realizes that gilding is an art form that finds beauty in a sea of complexity. There are several reasons why an exterior gilding project could fail. Let’s talk for a few minutes about some of these reasons.
Even the most seasoned and well-intended artisan can stumble and veer off the path of a successful gilding endeavor. By recognizing where these common pitfalls occur, we hope to help you navigate around them and ultimately empower you to produce exterior gilding ornamentation that will instill awe in onlookers for generations to come. Even if the exterior gilding project was perfectly done, repairs maybe required. One of the most common causes in those cases is damage from severe weather conditions such as hail or high winds blowing debris.
Below we discuss that details of the two of the most important variables when it comes to proper exterior gilding that also need to be addressed with repairs.
Materials Selection:
Purity:
Today’s artisans have a wide variety of colors and tones of gold leaf from which to choose. However, when it comes to exterior gilding, purity is key. Leaf made from 100% gold is 23.75 is required for exterior gold left. Anything less than 23-karat is better suited for interior ornamentation and will lead to failure if applied to an exterior substrate.
Here’s why; to produce a range of colors, copper and silver is mixed with gold. When copper is added, the leaf becomes warmer and richer in tone. When silver is added, the leaf becomes paler in tone. This adjustment to the tone and temperate certainly offers the artisan an appealing variety of aesthetics from which to choose, but it also has a critical influence on the leaf’s intended destination. The addition of these other metals to adjust tone and temperature incrementally lowers the karat value of gold. As the karat value decreases, it lowers the gold leaf’s resistance to weather and corrosion.
At 23-karat or 23.75-karat, which ranges from 96% to 98.5% in purity, the leaf’s copper or silver levels are so low that, when installed properly, it will maintain its integrity outdoors for 30 to 40 years or more.
Weight:
We talked about purity. We must also consider the leaf’s thickness or weight. Leaf thickness is best described as grams per 1,000 leaves. This measurement is used to compare one variety with another.
The appropriate weight of leaf for an outdoor surface is 21 to 23 grams per 1,000 leaves. Anything less should be reserved for indoor ornamentation.
The heavier the leaf, the longer it will repel the abrasive effects of snow, rain, wind, dust and sand particles.
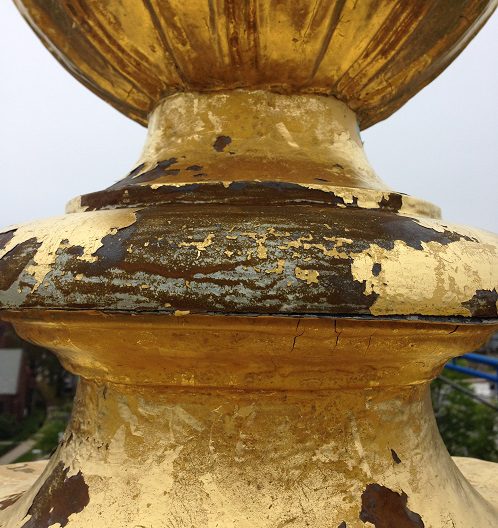
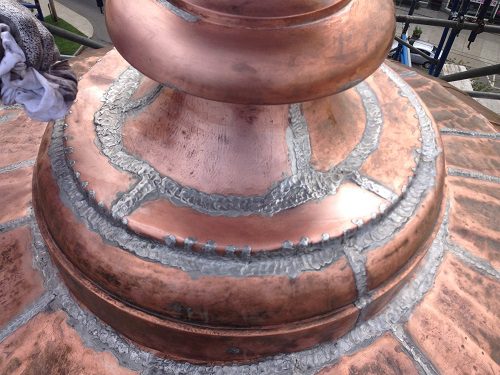
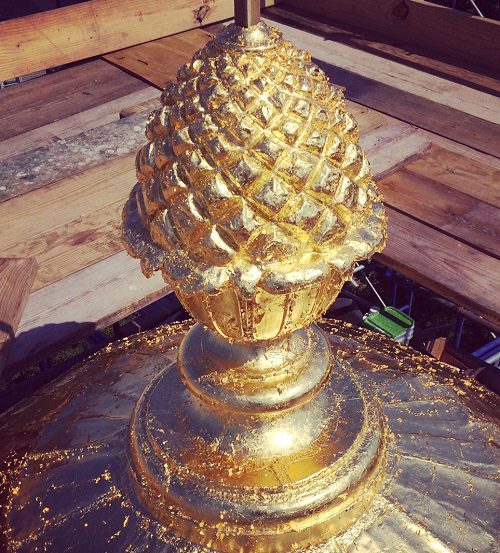
Gilding in need of repair (Left); Substrate surface prep (Center); Re-gilding in process (Right)
Process:
After selecting the proper karat and proper weight, what other factors must the artisan take into consideration?
Longevity of an exterior gilded object such as a statue, dome or other ornamental object is not only based on the selection of proper source materials, but proper application methods.
Step 1: Ensure a Suitable Substrate
Perhaps the most important yet most often overlooked step in a proper gilding application process comes in the beginning. The surface prep and substrate are CRITICAL to the success of the gilding project and if failure will occur. Before the artisan lifts a paint brush to prime and size the surface to prepare for new gold leaf, they must first pay careful attention to that surface’s existing condition.
When gilding projects fail, they usually fail from the inside out. If an existing substrate contains the lingering remnants of a prior covering, no number of applications of new primers, sealers, etc. will prevent a premature failure of the project. Since water can get through the gold leaf, the varnish, primer etc. have to be great which requires ALL previous coatings to be completely removed down to the bare substrate. Take Note: If someone says they have a primer that bridges old coating to new coating system it’s not true – it will not work.
The substrate, whether metal, fiberglass or even stone needs to have ALL the existing gilding and coatings to be removed absolutely 100% with no residue left behind. This step is just as critical as the gold leaf you choose for the exterior project.
Contaminants such as old sealers, deteriorated remnants of old sizing, copper or lead corrosion or rust, or even if portions of the substrate’s previous layer of gold leaf remain on the substrate, it will cause the project to fail. If the surface is not completely clean of existing coatings, this will cause corrosion and lead to major failing in a little under year and failure on a massive scale under a few years instead of decades. All remnants have to be removed through the use of chemical, grinding, blasting or whatever appropriate means are required to free the substrate of all residue.
It is mission critical to take the time to properly clean the surface and remove these contaminants prior to moving forward with any other step. When a repair is necessary, it’s best to remove all prior coverings and “start from scratch” on the original, 100% clean substrate.
Step 2: Prime
Now, with a 100% clean & residue free substrate from which to establish a new gilded ornamentation, it is necessary to first apply a high-quality primer over the substrate to ensure the gold layer has an appropriate surface to rest on. The artisan should select primers that are specially formulated for exterior gilding. Immediately prior to priming the surface the it should be washed with a quick evaporating solvent such as acetone or xylene to remove any containments that may affect the primary adhesion or performance of the primer. It maybe necessary to repeat this step as a second primer is applied.
Often it is necessary to recoat primed and sealed surfaces where there is evidence of bubble, suction spots or unsealed areas in first coat, to assure a finish coat with no burn-through or other defects due to insufficient sealing.
Don’t rush and underestimate the importance of that second coat.
Also, be sure that the primer used is compatible with the slow set oil size you plan to use in Step 3. If they’re not compatible, the problem doesn’t manifest itself until the artisan is trying to apply the size over the already prepared and primed surface and discovering the two materials are not compatible. The gilder then has to decide whether to: (a) Strip the surface and start over again; or (b) Apply a barrier coat that will be compatible with both materials. If you’re unsure, check with the manufacture.
Step 3: Size
Next comes the application of adhesive sizing. Size refers to the adhesive used to adhere the leaf to a surface. There are different kinds of size adhesive dependent on the finished look the artisan is trying to achieve. When applying genuine gold on an exterior object, an oil-based size is recommended.
It’s generally best practice to apply only as much size as can practically be gilded in the following working day. Overdoing it during the application process will lead to additional time and corrective measures in the days that follow.
Also, keep it clean. The artisan needs to maintain surfaces before and after application of size to be free of any dirt, dust or air-borne contaminants and pollutants. Each of these can lead to premature failure of the gilded object.
Plan accordingly and don’t forget to check the weather forecast before you begin.
Step 4: Testing the Tack
The next critical step which can throw off even the most seasoned artisan is determining the proper tack time. As the artisan’s size dries it naturally goes from a wet to a dry state. The proper time to apply gold leaf is when the size is not wet but tacky. This can be difficult to predict considering the influence of the weather, yet identifying the proper tack time of adhesive sizing will result in a professional and long-lasting finish.
Step 5: Application
Gold leaf is gently applied to the substrate based on the tack timing mentioned above. Work efficiently but cautiously to minimize the inevitable waste.
If possible, it’s best to use small, soft brushes to accurately apply the gold to the sizing. The brush allows the artisan to paste the gold more evenly and it is better for the smaller, more detailed elements within the ornamentation.
Look for any missed spots once the paper backing is carefully pulled away. Use any leftover bits of leaf to cover these missed spots. Working in small sections and paying attention pays dividends here.
Also, work in tandem with the sun. Don’t let sun glare interfere with your ability to see any of those missed spots. Work your way around the project accordingly.
Step 6: Burnish the Surface
After the application of the proper karat and proper weight leaf, the new gold is burnished. Burnishing in this case means to remove any excess gold that is not adhering to the surface with a soft sable brush or similar. Care must be taken so as not to scratch the gold surface. The artisan must be careful not to inadvertently create an inconsistent surface by over burnishing. It will make the finished surface look bad and it will diminish the durability and longevity of the project as a whole.
Gilding is a delicate art form that requires patience and a thorough understanding of the materials and methods necessary to achieve the desired results. Whether performing an initial application or repairing exterior gilding, there are an integrate number of complexities to the gilding process and none can be overlooked. If you are unsure of the condition of your exterior gilded elements and whether they are in need of repair, bringing in a professional for a finish inspection for the gilded elements to determine if there is damage, potential causes and whether maintenance or repair in necessary and to what extent.


